Gothic Tablescaping Part 3: Candle Arrangements
Candles are the soul of a gothic table. Not as decoration. As the primary light source. For the broader science of how colored and warm light affects mood, see our lighting color theory lesson. When the overhead lights go off and the only illumination comes from open flame, every surface on the table transforms. Crystal glitters. Metallic chargers glow. Faces soften. Shadows deepen in the folds of napkins. The entire room shifts from a dining space into something older and more intimate.
This lesson covers the practical side: which candles to use where, how to arrange them, how to keep your table from catching fire, and how to manage the beautiful mess that melting wax creates.
Candle Types and Where They Work
Taper Candles
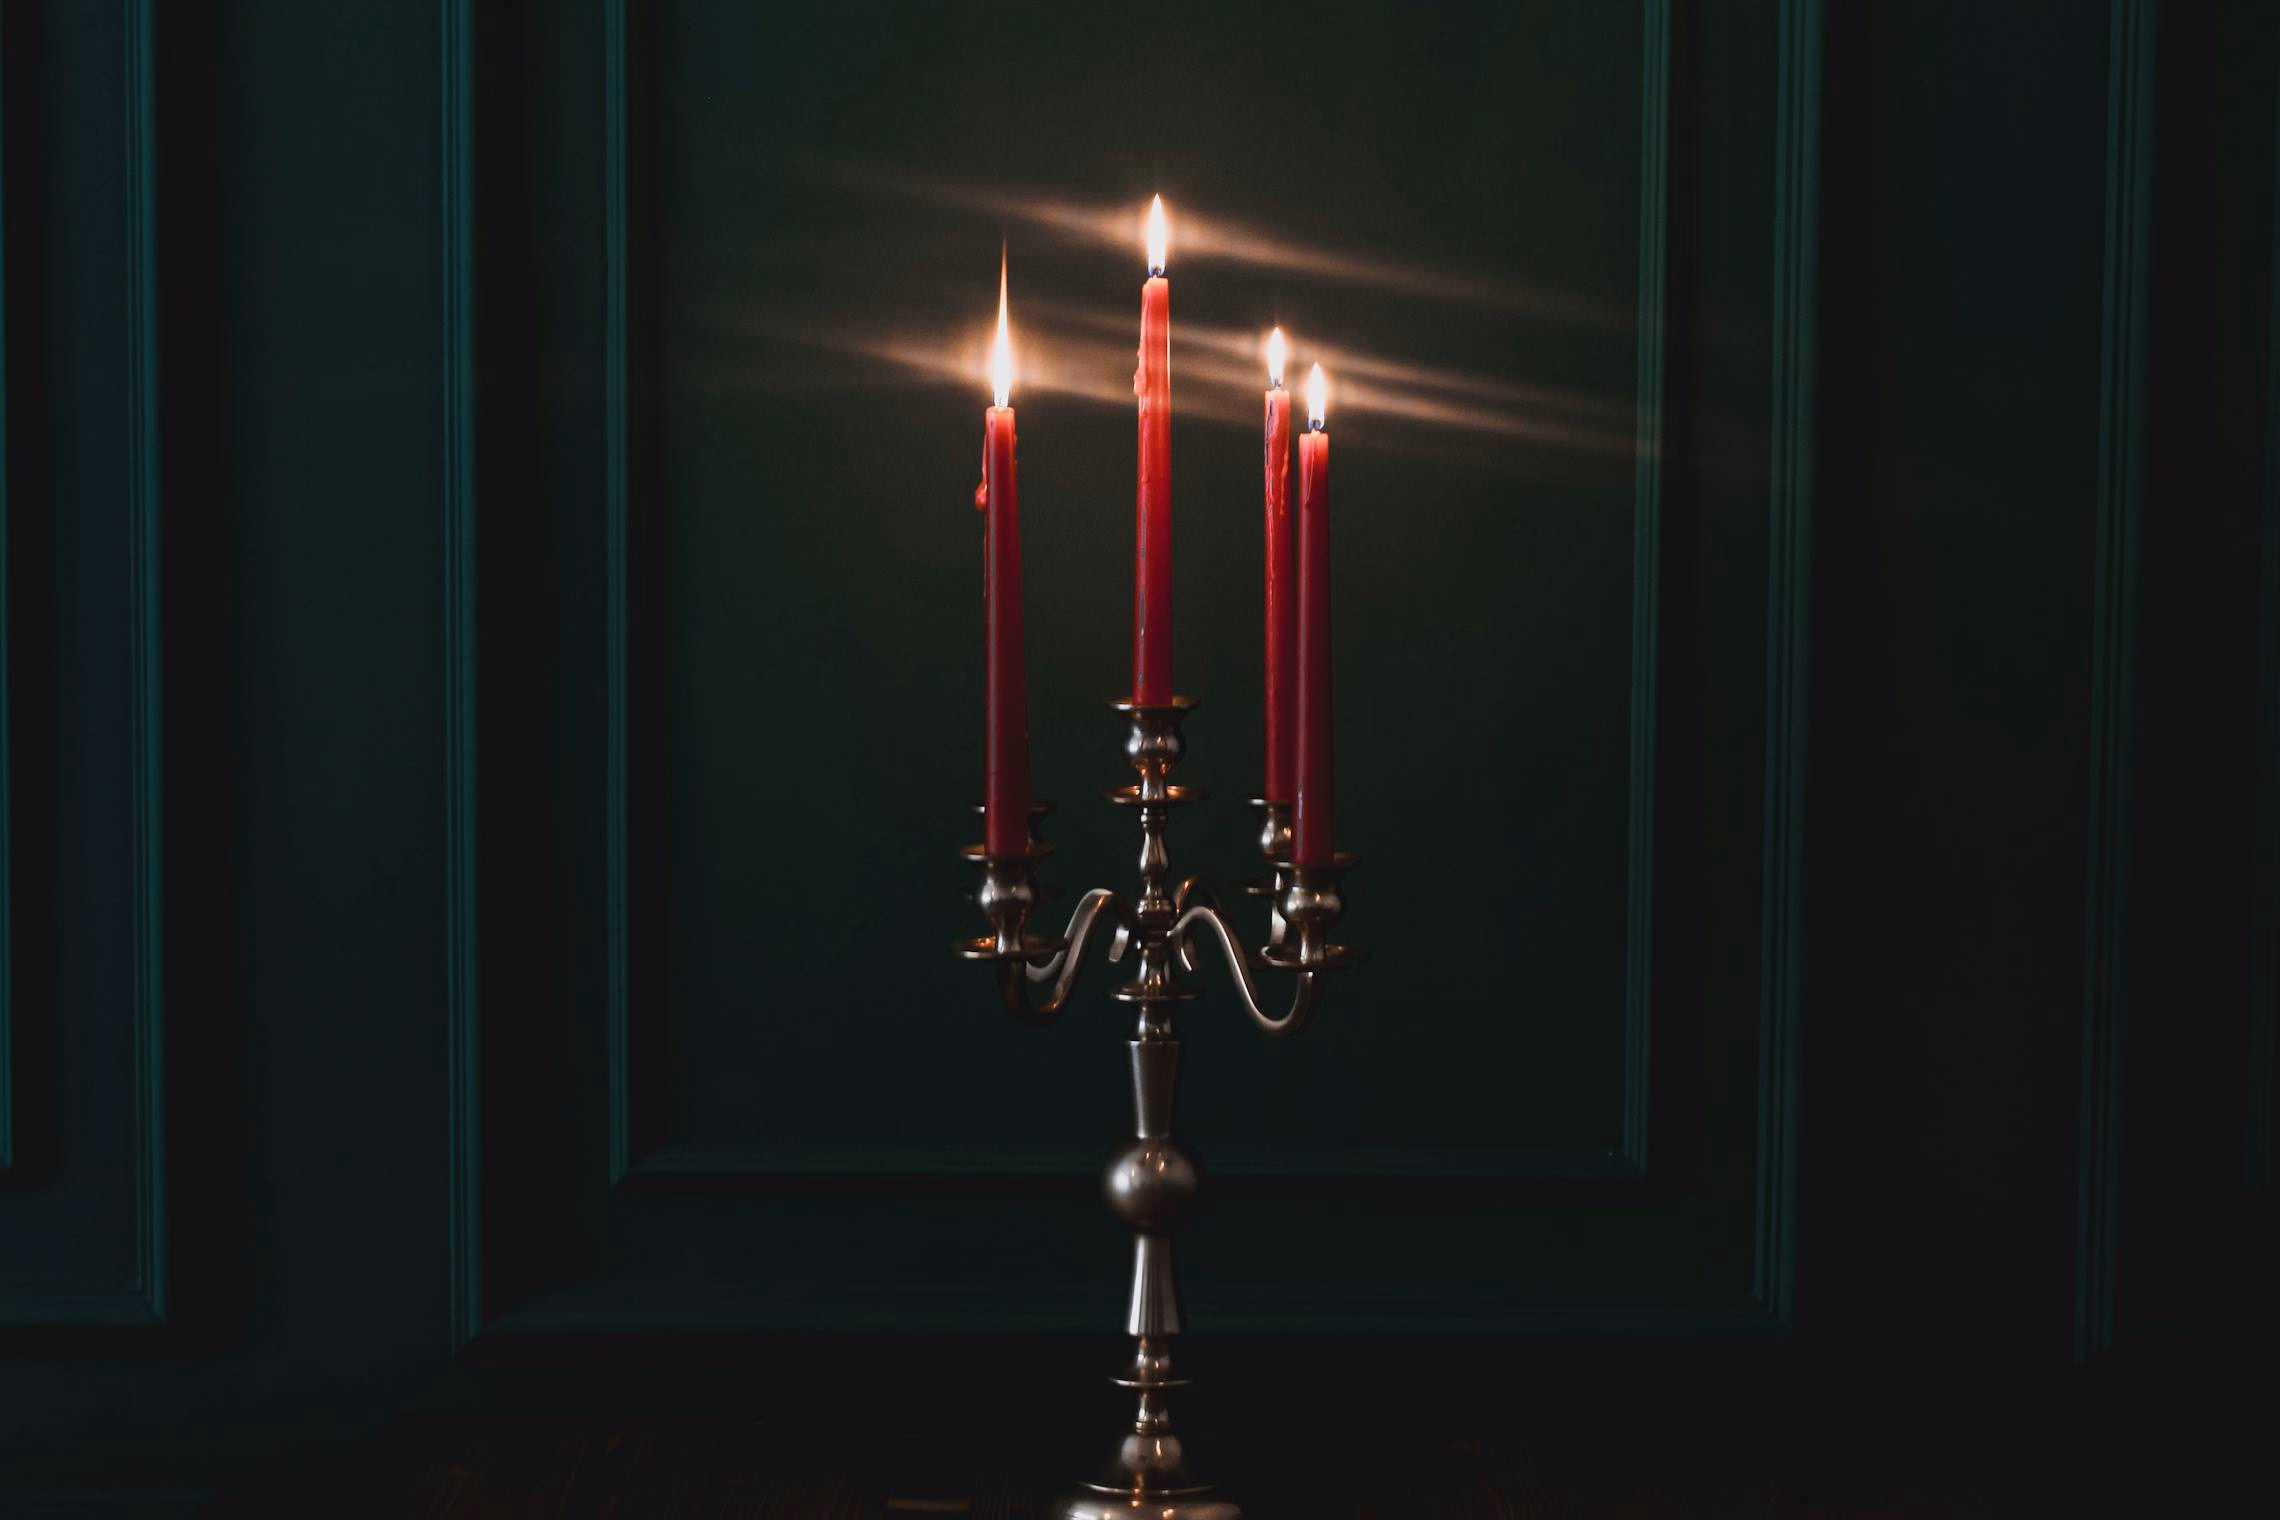
Tall, thin, and elegant. Tapers fit into candelabras, individual candlestick holders, and bottle-top adapters. They provide the most dramatic vertical element and the most visible flame.
Best for: The centerpiece candelabra (covered in Part 1), individual candlestick holders flanking the table, and mantelpiece displays.
Burn time: Standard 10-inch tapers burn 7-9 hours. Dripless varieties burn slightly longer. For a 4-hour dinner party, a fresh 10-inch taper will last the entire event with room to spare.
Colors: Black is the default. Burgundy, deep plum, and ivory are excellent alternatives. Avoid white (too bridal) and bright colors (too festive).
Pillar Candles
Thick, freestanding cylinders. Pillars sit on plates, trays, or directly on the table surface (with a protective base). They burn for a long time, produce a wide pool of liquid wax, and have a substantial, grounding presence.
Best for: Clustered arrangements on trays, inside lanterns, on mantels, and as anchoring elements in larger compositions. Pillars work well at lower heights where tapers would be too tall.
Burn time: A 3x6-inch pillar burns 60-80 hours. You’ll get multiple events from a single pillar, and the partially burned look actually improves the gothic aesthetic.
Tip: Let pillar candles burn long enough for the wax pool to reach the outer edge before extinguishing. This prevents tunneling (where only the center melts and the outer wall remains intact). A properly burned pillar develops an organic, melted landscape that looks far more interesting than a fresh one.
Votive Candles
Small, typically placed inside a glass votive holder. They cast a contained, intimate glow and work best in quantity.
Best for: Lining pathways, filling trays, clustering on mantels and side tables, and anywhere you need many small points of light. A row of 15 votives along a mantel creates a ribbon of warm light that’s simple and striking.
Burn time: Standard votives burn 8-15 hours depending on size.
Holders: Clear glass lets the most light through but lacks character. Smoked glass, mercury glass (spotted metallic coating), dark colored glass, or vintage pressed-glass holders all add personality. The holder itself becomes the design element; the candle inside is just the light source.
Tea Lights
The smallest option. Tea lights sit in a shallow metal cup and burn for 4-6 hours. Use them inside luminaries, jack-o’-lanterns, paper bag pathway lights, and any space where a votive would be too large.
LED tea lights are acceptable here, unlike larger formats where the fake flame is more obvious. The small size and typical containment inside a holder masks the artificiality.
Grouping Rules
Candles in groups look better than candles in isolation. The eye reads a cluster of flames as a single warm zone rather than a collection of individual objects.
Odd numbers. Groups of 3, 5, or 7 look more natural than even numbers. This is a design principle that applies broadly, but it’s especially noticeable with candles because they’re all the same basic shape. Two candles look like bookends. Three look like a composition.
Vary the heights. Within a group, no two candles should be the same height. Mix tapers of different lengths, pair a tall pillar with a short one, or combine types (one taper, one pillar, one votive) for maximum variation. The height differences create visual rhythm and prevent the group from looking like a fence.
Triangular arrangement. For a group of three, place them in a loose triangle (not a straight line). Two in front, one behind and between them. This creates depth and looks natural from any angle.
Cluster tightly. Candles in a group should be close together (2-4 inches apart) so the light pools merge. Widely spaced candles read as separate objects rather than a unified arrangement.
Height Variation Across the Table
Beyond individual groupings, plan the height progression across the entire table.
The valley principle: Tall elements at the center (the candelabra centerpiece), medium elements stepping down from there (pillar groupings), and low elements at the edges near the place settings (votives). This creates a gentle valley shape that allows conversation across the table while building visual drama toward the center.
For a long rectangular table: tall at center, stepping down in both directions toward the ends. For a round table: tall at center, radiating outward to low at the perimeter.
Fire Safety
Real candles on a table surrounded by fabric, paper, and (after a few drinks) unpredictable guests require precautions.
Non-negotiable rules:
- Never leave candles unattended. If you step out to the kitchen, have someone watching the table.
- Keep flames away from curtains, hanging decorations, dried flowers within reaching distance, and anything that can blow into the flame.
- Place every candle on a non-flammable surface. A plate, a tray, a stone slab, or a metal charger beneath each candle or candle group.
- Trim wicks to 1/4 inch before lighting. Long wicks produce tall, unstable flames and excessive smoke.
- Extinguish candles before they burn down to less than 1 inch of remaining wax. The heat concentrated in a small wax pool can crack glass holders or scorch surfaces.
- Keep a fire extinguisher accessible (not visible to guests, but within 30 seconds of reach).
Where to use LED instead of real: High-traffic areas where guests are moving through (hallways, buffet approaches), elevated locations where reaching to extinguish would be difficult, and anywhere near flowing costumes. Save the real candles for the seated dining table where guests are stationary and attentive.
Wax Drip Management
Dripping wax is part of the gothic aesthetic. Thick rivulets of black wax running down a candelabra look magnificent. But wax on a tablecloth, your grandmother’s charger plates, or hardwood floors is less magnificent.
Controlled dripping: Use “drip” tapers (non-dripless) in the candelabra where the drips add to the display, and use “dripless” tapers in individual candlestick holders near the place settings where drips would land on plates and napkins.
Protecting surfaces: A tray or shallow dish beneath each candle group catches wax drips. A dark metal tray is functional and fits the aesthetic. A mirror tile beneath a candle group catches drips and reflects the flame for a doubled visual effect.
Cleaning wax: Wax on fabric: freeze with ice cubes, then chip off the brittle wax. Wax on hard surfaces: let it cool completely, then peel or scrape with a plastic card. Wax on glass holders: freeze the holder and the wax will contract and pop out cleanly.
For more candle-lit room inspiration in a Victorian gothic context, browse our Victorian gothic decor gallery. Now dress the table with the final element: the food and drink presentation.
Next up: Part 4: Food Presentation